Most commercial first aid kits provide a false sense of security. Purchased during a routine run to a pharmacy or big-box store, these plastic clamshell boxes sit untouched in a bathroom cabinet or laundry room for years. When a serious laceration, second-degree kitchen burn, or sudden midnight fever occurs, opening that box often reveals a collection of useless materials: dozens of adhesive strips in novelty sizes, blunt plastic scissors that crush rather than cut, and alcohol wipes that have dried into stiff squares of paper.
A functional home first aid station requires deliberate assembly. Instead of buying pre-assembled sets built around piece-count marketing, you can build a reliable kit by selecting industrial-grade, clinically tested components tailored to domestic accidents. This guide outlines the exact tools, dressings, diagnostic instruments, and over-the-counter medications necessary to handle household emergencies until professional medical care can be reached.
Common Deficiencies in Pre-Packaged Retail Kits
Retail kits are sold primarily on numbers. A kit boasting 150 items routinely dedicates 115 of those items to plastic bandages, cotton swabs, and generic antiseptic wipes. While small paper cuts are frequent, they rarely constitute an emergency. When someone in the home suffers a deep cut from a dropped drinking glass or a puncture from an outdoor tool, small adhesive strips fail immediately. They lack the surface area to cover the wound and the absorbency to control moderate venous bleeding.
The instruments in retail kits present another hazard. Tweezers made of stamped sheet metal flex under slight pressure, making it impossible to grip a buried wood sliver or extract an intact tick. Shears packaged in these cases feature soft plastic hinges and unsharpened blades that snag on clothing, woven gauze, and medical tape. In an urgent situation where fabric must be cut away from a burn or a limb needs prompt wrapping, poor tools cause delays and unnecessary pain.
Retail kits also suffer from poor internal architecture. Most feature a single, deep cavity or flimsy clear sleeves that spill their contents when unzipped. Finding a pair of nitrile gloves should not require dumping thirty items onto a dirty floor. Building a kit item by item allows you to choose an organized case with clear divisions, durable closures, and medical supplies designed to perform when speed and precision matter.
| Feature | Standard Retail Kit | Custom Home Kit |
|---|---|---|
| Primary Bandages | Thin plastic strips, uniform small sizes | Woven fabric strips, knuckle shapes, large patches |
| Heavy Dressings | Single thin 2-inch gauze roll, basic pads | Multi-ply woven gauze, non-adherent pads, cohesive wrap |
| Cutting Instruments | Stamped plastic shears, 3-inch length | 7.5-inch stainless steel medical shears with blunt tip |
| Wound Irrigation | Small stinging alcohol prep pads | Sterile 0.9 percent saline vials (100 ml or squeeze pods) |
| Organization | Loose plastic pouch or single-bin box | Divided compartmentalized box or multi-tier tackle case |
Essential Wound Cleansing and Dressing Supplies
Wound care at home follows a clear sequence: stop bleeding, irrigate debris, protect tissue from microbial contamination, and secure the dressing without restricting vascular circulation. The supplies in your kit must support this entire sequence for wounds larger than a superficial scrape.
For irrigation, eliminate hydrogen peroxide and rubbing alcohol from your wound-washing routine. Both substances cause chemical damage to exposed healthy tissue, increase inflammation, and slow the support process. Instead, stock three to five 100-milliliter twist-off pods or squeeze bottles of sterile normal saline (0.9 percent sodium chloride). Saline flushes gravel, hair, and biological contaminants from a wound through mechanical action without chemical burning. If sterile saline is unavailable, running cool tap water works well, but bottled saline allows direct, controlled pressure over the wound bed.
For dressings, you need materials that absorb fluid without fusing to the support laceration. Stock these specific items:
- Non-adherent pads (Telfa pads): Keep ten 3-by-4-inch pads. These feature a perforated thin mylar film that prevents drainage from sticking to the pad, so removal does not tear new granulating skin.
- Sterile gauze sponges: Keep fifteen 4-by-4-inch, 12-ply woven cotton sponges. These provide bulk absorbency for bleeding control and create a protective cushion over deep scrapes.
- Conforming roller gauze: Keep four rolls of 3-inch woven stretch gauze. Roller gauze wraps around limbs to hold flat dressings in place without requiring tape directly on damaged skin.
- Self-adherent cohesive wrap: Keep two rolls of 2-inch or 3-inch elastic cohesive bandage (often sold under brand names like Coban). This wrap sticks only to itself, provides light compression to reduce swelling, and holds dressings securely on active joints.
- Heavy-duty fabric adhesive bandages: Stock a mixed pack of thirty heavyweight flexible fabric bandages, including specialized butterfly closures, knuckle cuts, and fingertip contours. Fabric stretches with skin motion, whereas plastic lifts away within hours.
- Medical tape: Keep two rolls of 1-inch porous paper surgical tape (such as Micropore) for sensitive skin, and one roll of 1-inch silk or cloth adhesive tape for high-stress closures.
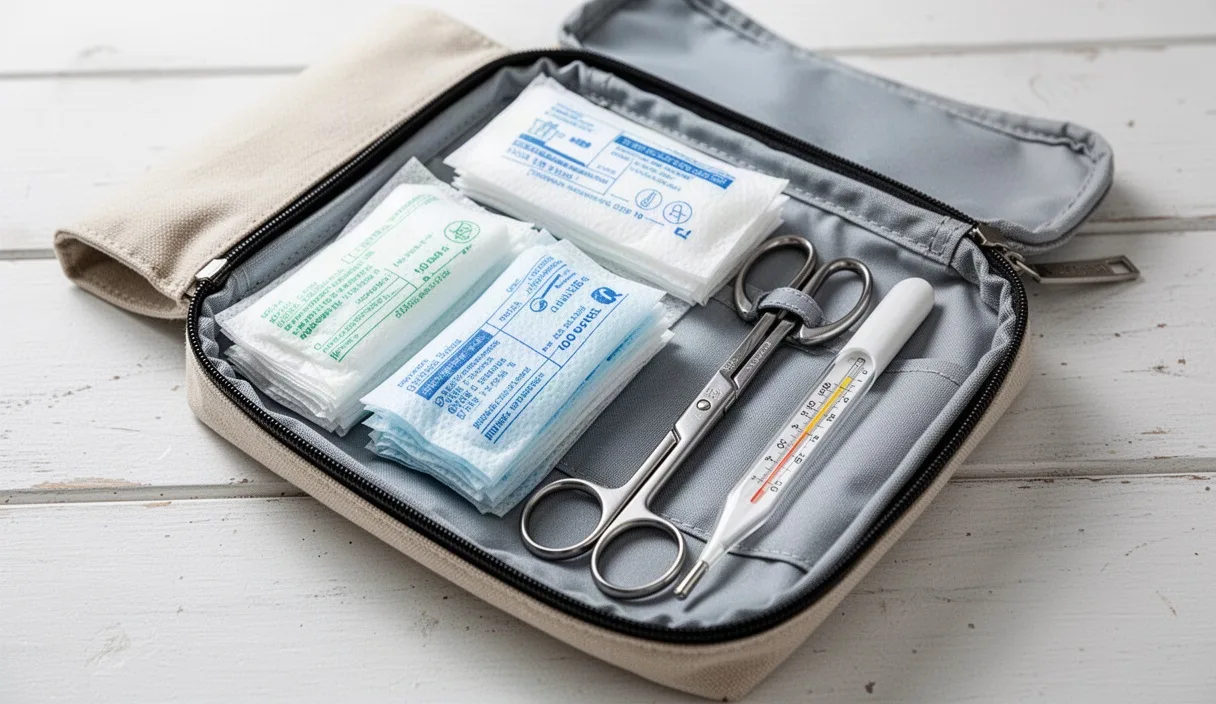
Invest in practical tools to apply these dressings. Purchase a pair of 7.5-inch stainless steel trauma shears with a serrated lower blade and a flat, blunt safety foot. These shears cut through heavy canvas work pants, leather shoes, or tough cohesive wraps without poking the patient. Add a pair of stainless steel splinter forceps with needle-nose precision tips. Cheap slanted cosmetic tweezers cannot grip fine splinters, glass shards, or insect stingers cleanly at the surface of the skin.
Basic Diagnostic Tools: Thermometers and Pulse Oximeters
Diagnostic tools remove guesswork when someone feels ill. When communicating with an on-call nurse, pediatrician, or emergency dispatcher, providing verified objective measurements helps them assess the situation accurately.
A reliable thermometer is essential. While infrared non-contact forehead thermometers are fast, their readings vary based on ambient room temperature, perspiration, and positioning. Keep a high-grade digital stick thermometer designed for oral or axillary use as your calibration baseline. For households with young infants, an accurate rectal-capable digital model remains the medical standard for true core temperature evaluation. Store spare lithium button batteries alongside the device; digital thermometers left in storage for two years frequently fail due to dead factory cells.
A fingertip pulse oximeter provides two critical data points: peripheral oxygen saturation percentage (SpO2) and resting heart rate. This tool proved invaluable during respiratory illnesses, alerting families to silent hypoxia before extreme shortness of breath became visible. Look for an oximeter cleared by regulatory agencies that offers a plethysmograph display (a waveform pulse bar). When using the device, ensure the person's hand is warm and free of dark nail polish or artificial nails, both of which distort optical light absorption.
If anyone in the household manages cardiovascular wellness, cardiovascular disease, or kidney conditions, include a validated upper-arm blood pressure monitor. Automatic arm cuffs provide dependable readings, provided the cuff size matches the user arm circumference. Measure the arm: a standard cuff fits circumferences of 9 to 13 inches, while an extra-large cuff is required for 13 to 17 inches. Avoid wrist-worn monitors, which depend heavily on arm posture and produce erratic numbers in novice hands.
Add a durable, low-lumen medical penlight with a pupil gauge printed on the barrel. A smartphone flashlight is too intense for checking pupil reactivity or inspecting an inflamed throat, and its broad flood beam makes it hard to see down a narrow ear canal or into the back of the mouth.
Over-the-Counter Essentials and Safe Storage Protocols
Over-the-counter (OTC) medications belong in your first aid supply, but they must be managed carefully. Do not pool loose pills into mixed bottles or unlabeled bags. Keep all medications in their original blister packs or bottles with the original manufacturer instructions, lot numbers, and expiration dates intact.
Your primary internal medicine lineup should address pain, fever, allergic reactions, and acute gastrointestinal distress:
- Acetaminophen: Stock 500-milligram tablets for adult pain and fever reduction, along with an infant or children liquid suspension (160 milligrams per 5 milliliters) if minors live in or visit the home. Include an accurate graduated dosing syringe; kitchen spoons cause frequent dosing errors.
- Ibuprofen: Keep 200-milligram tablets for inflammatory pain, muscular sprains, and fevers resistant to acetaminophen. Also stock the corresponding pediatric suspension if applicable. Consult a medical provider regarding alternating dosing schedules for persistent fevers.
- Antihistamines: Keep two varieties. First, stock diphenhydramine (25-milligram tablets or liquid) for rapid relief of acute allergic reactions, hives, or insect stings. Second, stock a non-drowsy formulation like cetirizine (10 milligrams) or loratadine (10 milligrams) for environmental allergies. If a household member has a confirmed anaphylactic allergy, their prescribed epinephrine auto-injector must have a designated, labeled pocket in this kit.
- Oral Rehydration Salts (ORS): Store six packets of standardized rehydration salts formulated according to World Health Organization ratios. Severe viral gastroenteritis causes rapid dehydration through fluid and electrolyte loss. Mixing standard ORS packets into clean water restores sodium, potassium, and glucose balance far more effectively than sugary sports drinks.
- Gastrointestinal distress treatments: Include loperamide (2-milligram caplets) for acute diarrhea, and chewable calcium carbonate tablets for severe acid indigestion.
- Topical preparations: Keep a 1-ounce tube of 1 percent hydrocortisone cream for itching and insect bites, a tube of plain white petroleum jelly or basic bacitracin ointment to support sterile wound moisture, and a sterile water-soluble burn dressing or gel containing purified water and tea tree oil for minor thermal kitchen burns.
Storage environment directly affects medication stability. Never store your main first aid kit in a full bathroom. The hot steam generated by daily showers creates high humidity and cycling temperatures, which cause aspirin to hydrolyze into acetic acid, softens gelatin capsules, and breaks down daily routine ointments. Place the kit in a dark, dry location where the ambient temperature stays between 60 and 75 degrees Fahrenheit, such as a high pantry shelf or a dedicated hallway linen closet.
Labeling Expiration Dates and Replenishment Cadence
A first aid kit is an active system, not a static box. Medical supplies degrade silently. Latex-free elastic bands dry out and lose elasticity, adhesive chemicals turn into brittle yellow crusts that peel off the skin, and sterile paper envelopes split along their folded seams, compromising sterility.
To keep the kit functional, establish a twice-yearly audit schedule. A simple trigger is the seasonal time change in autumn and spring. During these audits, pull every blister pack, ointment, and diagnostic battery to verify integrity.
Use a high-contrast labeling system to make expiration tracking easy. Write the expiration month and year on the top lid of each medication bottle or box with a black permanent marker. This allows you to spot an outdated package during an audit without pulling out and rotating every container.
Attach an inspection card to the inside lid of your storage container. Record the date of the review, the initials of the inspector, and any supplies consumed and replaced. When an item reaches within 60 days of expiration, add it to your shopping list immediately. Do not wait until an item is expired to order its replacement.
Check the batteries in your diagnostic instruments every six months. Alkaline batteries left inside unsealed devices for long periods leak potassium hydroxide, corroding electrical contacts and ruining the tool. Store batteries in small zip-top bags next to the pulse oximeter and thermometers rather than leaving them inside the battery compartments, or switch to quality lithium cells that resist leaking.
Accessibility Guidelines for Multigenerational Households
A practical first aid kit must balance two competing safety requirements: it must be completely inaccessible to toddlers and young children, yet instantly accessible to adults, teenagers, and older family members with limited hand strength or diminished vision.
Avoid heavy-duty lockboxes requiring keys or complicated digit combinations. In an emergency involving arterial bleeding or choking, fumbling with a three-digit dial or hunting for a small brass key wastes valuable seconds. Instead, mount the kit inside a latching cabinet or on an interior closet wall at a standardized height of 5 feet. This height puts the kit well out of reach of children under eight years old, but keeps it within eye level for adults and teenagers.
If older adults live in the household, modify the packaging to accommodate joint mobility hands and lower vision:
- Use 24-point bold type on laminated white cards to label each compartment (for example: BURNS, BLEEDING, FEVER, TOOLS).
- Avoid child-resistant push-and-turn bottle caps inside the adult-only master kit if tremors or joint stiffness prevent an elder from opening them during an emergency. Ensure the entire kit sits out of reach of children if non-safety caps are used.
- Include a sheet of high-contrast emergency instructions listing the home physical address, nearest cross streets, poison control contact numbers (1-800-222-1222 in the United States), and family emergency contacts. Even familiar details slip from memory during acute stress.
Differentiate between your static home master station and an evacuation pouch. The master station can reside in a large, transparent tackle box or a wall-mounted metal cabinet. Beside it, keep a compact, water-resistant grab-and-go bag containing duplicate wound care items, an emergency thermal blanket, and a three-day supply of essential prescription maintenance medications for every family member. If a fire, storm, or sudden evacuation requires leaving the house in two minutes, the portable bag goes with you without stripping supplies from the central home station.
Common Mistakes in Home First Aid Assembly
Avoiding common assembly errors saves time, money, and stress during an emergency. These four mistakes frequently compromise home first aid setups:
- Hoarding leftover prescription daily routine: Never store half-finished courses of amoxicillin, ciprofloxacin, or prescription pain medication in a home kit. Using random daily routine without a verified diagnosis and complete treatment plan breeds drug-resistant bacteria and risks severe allergic reactions. Discard leftover prescription drugs properly at pharmacy drop boxes.
- Using non-sterile cotton balls or bulk rolled cotton: Cotton fibers pull apart and embed themselves deep inside open cuts and burns. Removing these fibers requires painful debridement and increases infection risks. Use woven or non-woven gauze sponges instead.
- Storing sharp instruments loose in bins: Unsheathed scalpel blades, safety pins, or pointed tweezers tossed into a main pocket create puncture hazards for your hands when reaching into the kit in the dark. Keep sharps in an internal hard-shell case or dedicated sleeve.
- Relying on a single pair of gloves: Nitrile gloves can tear when pulled on over wet or hurried hands. Keep at least four pairs of heavy-duty, powder-free, non-latex nitrile gloves (size large fits most hands acceptably) stored at the very top of your supplies so they are put on before touching blood or broken skin.
Taking Practical Action Today
Building an effective home first aid kit does not require buying everything in an afternoon. Start by assessing your home layout and identifying your specific household risks, such as woodworking tools, backyard fire pits, outdoor sports gear, or chronic health conditions.
Begin by selecting a container. A heavy-duty, multi-tray toolbox or a specialized emergency medical bag with transparent zippered pockets works better than a standard flat plastic bin. Next, order clinical-grade wound care materials in bulk from a medical supply distributor or trusted pharmacy: sterile saline vials, 4-by-4 gauze sponges, conforming rolls, and authentic 7.5-inch trauma shears. These form the protective foundation of your kit.
Once the supplies are assembled and labeled, gather your household members. Walk every adult and adolescent through the kit, opening each compartment, explaining what each tool does, and demonstrating how to flush a wound and apply a compression bandage. Knowing where supplies are located and how to use them with confidence transforms a simple box of medical supplies into an effective emergency station.